How to kickstart your first Google Ad Grants campaign

With an unbeatable ROI and user-friendly interface, Google Ad Grants are a must for your nonprofit organization’s online marketing campaign. Whether you are cultivating your nonprofit’s first donors or looking to grow your donor base, Google Ad Grants can help you achieve your outreach goals.
Learn everything you need to know about launching your first Google Ad Grants campaign in this beginner’s guide.
1. Activate your Ad Grants account
To sign up for the program, your nonprofit must be enrolled in Google for Nonprofits, have a website, be secured with HTTPS, and comply with Ad Grants policies.
To begin the activation process, take the following steps:
- Create or sign into your Google for Nonprofits account
- Click “Get Started” under Google Ad Grants
- Enter the website your organization wants to direct traffic to (likely your homepage)
- Click “Submit Website” to ensure that your website is secure with HTTPS
- Fill out the Google Ad Grants eligibility form and submit it upon completion
It might take a few business days to be approved, so don’t worry and be patient if you don’t hear back right away.
2. Create your campaign
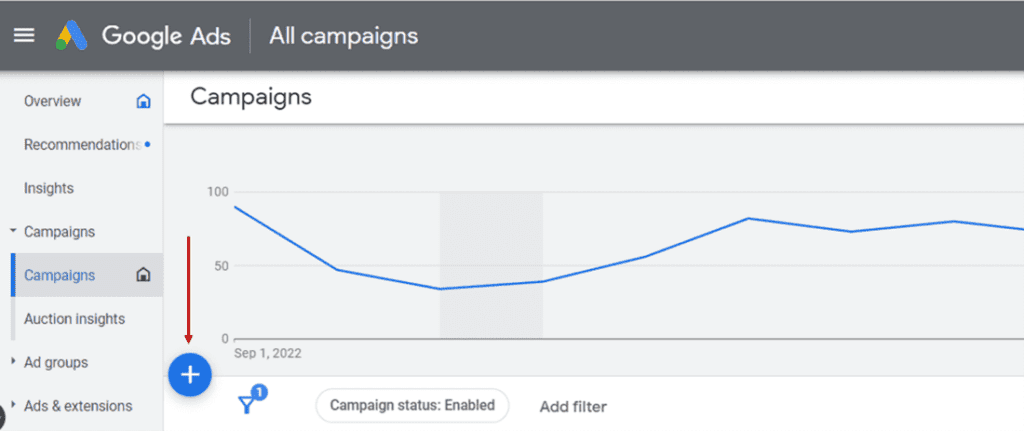
Once you’ve registered as a Google Ad Grants recipient, you can dive into your first campaign. When you’re ready to begin, navigate to the homepage of your Google Ads account and click the blue plus sign to get started.

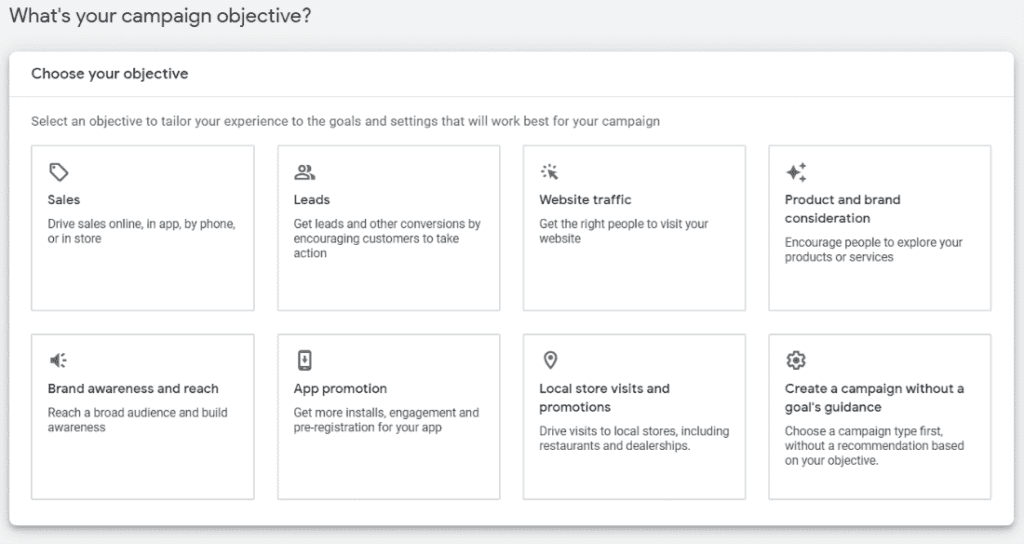
Once you click the blue plus sign, select the “new campaign” option. You will be taken to a new page that allows you to choose your campaign objective. Review all the campaign objectives from this list:

- Sales
- Leads
- Website traffic
- Product and brand consideration
- Brand awareness and reach
- App promotion
- Local store visits and promotions
You can also choose to create a campaign without a specific goal if you would like to create the campaign type first. Work with your team to select the top objective that best aligns with your nonprofit’s overarching purpose.
3. Pick a campaign type
Next, it’s time to choose a campaign type from the following options:
- Performance Max
- Search
- Display
- Video
- App
- Smart
- Shopping
For more information on the different campaign types, Google Help has resources on how to choose a campaign type. We recommend starting off with a simple “search” campaign.
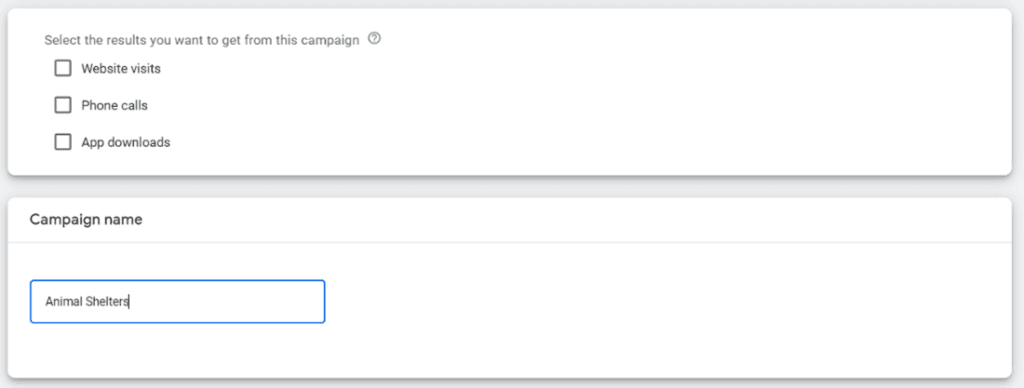
Select the results you want to get from your campaign, whether it be website visits, phone calls, or app downloads. Finally, don’t forget to name your campaign.

4. Build out your Google Ad Grants campaign
Now comes the most important part of the process: fleshing out your Google Ad Grants campaign. This includes completing the following sections:
Bidding
When your nonprofit places its bid on your target keywords, you’re setting the maximum amount you’ll pay per click on your ad. While placing your bids, keep these caveats in mind:
- Google’s manual bid limit. Your nonprofit can bid up to $2 per click on your keywords. This limit is in place to prevent auction inflation so that nonprofits can yield the max ROI for their campaign.
- Ad quality. When users search for keywords that multiple nonprofits have targeted, Google decides which nonprofit will win the auction by your nonprofit’s Quality Score. This is calculated by factors such as your website’s relevance, page speed, and expected click-through rate.
- Daily budget. Google Ad Grants recipients have a daily spending budget of $329, which equates to about $10,000 per month, so your nonprofit doesn’t exhaust your awarded funds too quickly.
These are the most important features to keep in mind when placing bids but keep in mind that every nonprofit Google Ad Grants recipient is different and should account for different caveats.
Campaign Settings
You can include your ads in both the search network and the display network. Search ads are designed to show ads to users who are actively searching for related keywords, whereas display ads are designed to create brand awareness earlier in the sales funnel. We recommend just including the search network, as the display network can sometimes include irrelevant websites.
Keywords and ads
In this section, Google Ad Grants can populate keyword suggestions based on your URL or product pages, or you can input them yourself. After you’ve added your keywords, you’ll type your ad copy. Ensure you include the URL that you want the user to go to and input as many headlines and description lines as you can. Google Ad Grants will populate a preview of the ad when you’re finished, as well as an ad strength score to help you determine if you should make adjustments.
Extensions
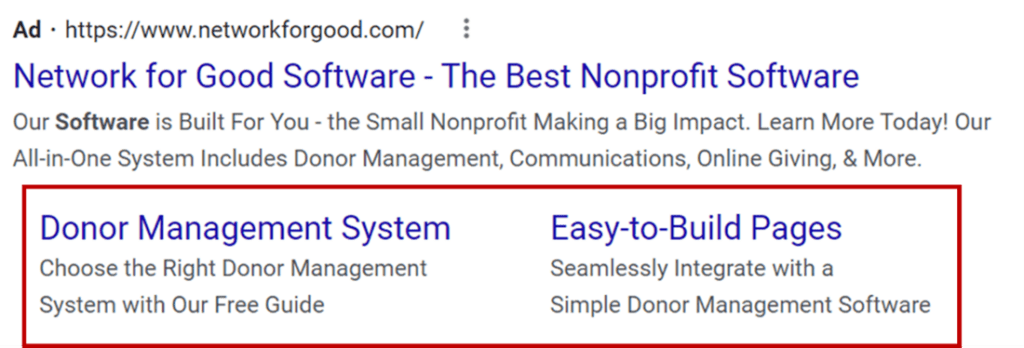
While extensions are optional, we recommend including them because they’re essentially an extension of your ad. This is a great way to give your ad more real estate, meaning it takes up more space on the search engine results page. See an example of an extension below:

Leveling up your Google Ad Grants campaign
Once you’ve completed all of these steps, review your information to ensure everything is accurate and you are ready to launch your first Google Ad Grants campaign, Then, after you start your campaign, ensure you check in on your performance a few times a week to ensure everything is set up properly and is seeing expected results.
Want the marketing resources to increase your donor base even more? Pair your free advertising efforts through Google with Bonterra’s donor engagement software to set your nonprofit up for success. Once you gain more supporters, our donor management platform can help you address pain points such as keeping up with your donors’ information and reporting your organization’s progress to your board. Schedule a free demo to learn more about Bonterra today.
Ready to Get Started?
Work with Bonterra


